
Fermented Carrots
Fermented carrots contain probiotics, which are beneficial bacteria that help improve digestion and promote a healthy gut. They can also alleviate digestive issues such as bloating, gas, and constipation.
Equipment
- Fermentation weights Or something to hold the carrots under the Brine.
- Pickle pipes You can also use a piece of cloth or a coffee filter and a rubber band
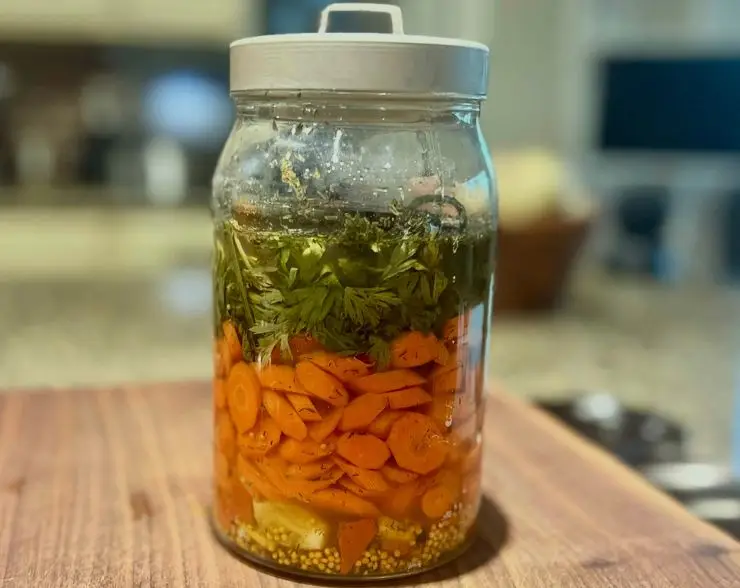
- 1 Quart wide mouth mason jar
Ingredients
- 1 pound organic carrots, peeled and cut into sticks or slices (about enough to fill a quart jar) I think one pound normally does a quart jar.
- Sea Salt 1 tbsp one cup of water
- Filtered water No chlorinated water
Optional Add Inns
- 1 inch Fresh ginger diced
- 1 inch Fresh Turmeric diced
- 4 Whole peppercorns smashed
- 2-3 Cloves garlic smashed
- 1 Tbsp Dried dill
- A few sprigs of fresh dill
- 1 tsp mustard seed and 1 teaspoon of caraway.
- 1 jalapeno pepper sliced in half along with a few slices of onion
Instructions
- Make the BrineDissolve 2 teaspoon Redmond salt in 2 cup filtered water. Set aside.
- Pack the JarPlace your flavorings in the bottom of the jar.Pack the carrots in tightly on top, leaving 1 inch of headspace at the top.
- Pour the brine over the carrots until they are completely submerged.Place a layer of cabbage leaf or the trimmed carrot tops over the packed carrots.This creates a barrier so small pieces don’t float.Then place a fermentation weight on top of that layer to hold everything below the brine.Add the Brine + WeightSubmersion = safety. Anything above the brine can mold.
- Seal for FermentationAdd a fermentation lid, pickle pipe, or cover the jar with a cloth and rubber band.Set the jar on a small plate or towel to catch any overflow.
- Ferment at Room TemperatureStore in a dark, room-temperature place like a cupboard.10-14 days: crisp and lightly tangy21–28 days: deeper flavor and slightly softer textureCloudiness, bubbles, and even white surface film (kahm yeast) are normal.Kahm yeast is harmless — just skim it off when fermentation is done.
- Set the jar on a towel or plate to catch any possible brine overflow that will occur during the first week of fermentation
- White bubbles or foam on the top is totally normal! That's a sign of a healthy ferment.
- Finish + StoreRemove the weight and any surface yeast.Replace with a regular lid and store in the refrigerator.They will stay good for several months.
Notes
- Do not use chlorinated tap water — it can inhibit fermentation.Redmond Real Salt is recommended because it’s pure salt with no anti-caking agents.The longer the ferment, the stronger the tang — taste as you go.
Tried this recipe?Let us know how it was!