
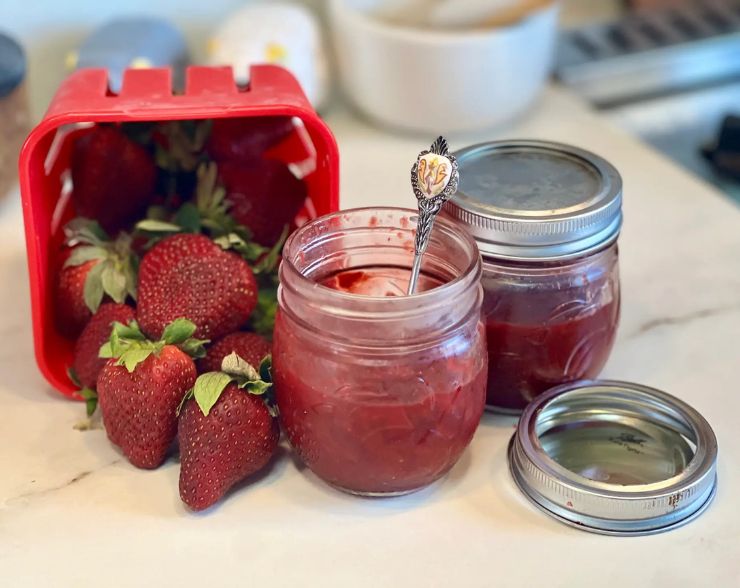
Easy Homemade Strawberry Jam:
This homemade strawberry jam is made for water bath canning using Pomona’s Universal Pectin, giving you the flexibility to use less sugar or alternative sweeteners like honey or maple syrup while still creating a beautifully set jam with fresh strawberry flavor.
Equipment
Ingredients
- 6 cups strawberries, washed, hulled, and lightly diced
- 2 tsp calcium water
- 2 tsp Pomona’s Universal Pectin
- 1/2 tsp kosher salt
Optional
- 1-2 tbsp fresh lemon juice for a brighter flavor
Balsamic Strawberry Jam
- 1 tbsp Balsamic Vinegar This is to replace the lemon
Sweetener Options
- 1½ cups pure cane sugar for a classic sweet jam
- 1/2-1 cup pure cane sugar for a lower sugar jam with more strawberry flavor
- 1/2-1 cup honey
- 1/2- pure maple syrup1
Instructions
Prepare the Canner and Jars
Before starting the jam, prepare your water bath canner by filling it with enough water to cover the jars by at least 1 to 2 inches once submerged. Place the canner on the stove and begin heating the water.Wash your jars, lids, and bands in hot soapy water. Keep the jars hot until ready to use. You can keep them in the warm canner water or in a low oven while the jam cooks.Cook the Strawberries
Add the diced strawberries to a large heavy-bottomed pot over medium heat. As the strawberries begin to soften and release their juices, gently mash them to your preferred texture.Some people prefer a smoother jam while others like larger pieces of fruit.Allow the strawberries to cook for several minutes until juicy, softened, and fully heated through.Add the Calcium Water
Stir in the calcium water, kosher salt, and optional lemon juice if using.Bring the strawberries to a full rolling boil over medium-high heat.Mix the Pectin and Sweetener
In a separate bowl, thoroughly mix the pectin into your sweetener of choice. Mixing the pectin into the sweetener first helps prevent clumping when added to the hot strawberries.Finish the Jam
Slowly add the pectin mixture into the boiling strawberries while stirring constantly.Continue stirring and return the jam to a full rolling boil. Boil for 1 to 2 minutes, just until the pectin is fully dissolved.Avoid overcooking the jam, which can darken the color and dull the fresh strawberry flavor.Fill the Jars
Carefully ladle the hot jam into hot jars, leaving ¼ inch headspace.Use a clean bubble remover or utensil to remove any trapped air bubbles by gently sliding it around the inside edges of the jar.Because jam can be sticky, wipe the jar rims carefully with a cloth dipped in vinegar to help ensure a proper seal.Place the lids on the jars and apply the bands fingertip tight. Do not overtighten.Process the Jam
Carefully place the filled jars into the prepared water bath canner.Make sure the jars are covered with at least 1 to 2 inches of water.Cover the canner with the lid and bring the water to a full boil.Once boiling, process the jars for 10 minutes, adjusting for altitude if needed.When the processing time is complete, turn off the heat, remove the canner lid, and allow the jars to sit in the hot water for about 5 minutes before removing them. This helps reduce siphoning.Cool and Store
Carefully remove the jars and place them on a towel-lined counter.Allow the jars to cool undisturbed for 12 to 24 hours.As the jam cools, it will continue to thicken and set.Check the seals before storing. Any unsealed jars should be refrigerated and used first.
Tried this recipe?Let us know how it was!