
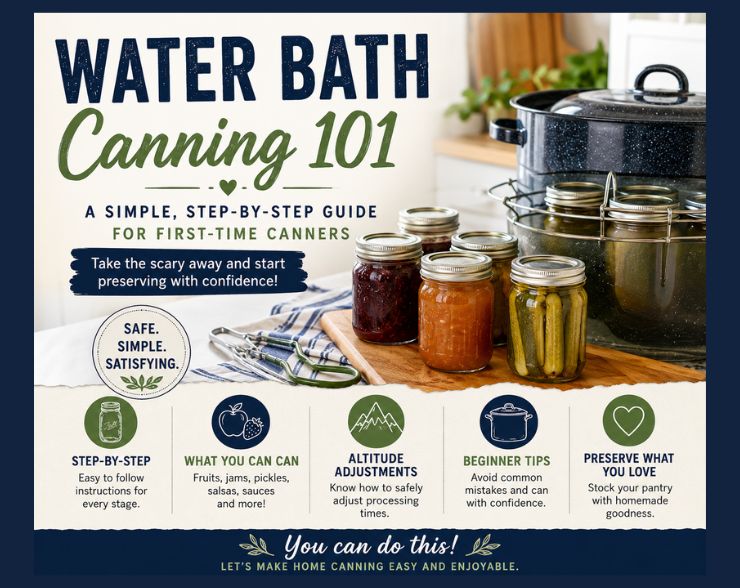
A Simple Way to Start Preserving Food at Home
Water bath canning can feel intimidating the first time you do it, but most of that fear comes from not understanding the process. Once you know what each step is doing, it becomes much less scary.
This guide is meant for the first-time canner. We are going to walk through the process in order, from warming your jars to checking your seals, so you know what to expect before you ever turn on the stove.
Water bath canning is not for every food, but for high-acid foods like jams, fruits, pickles, relishes, and properly acidified tomato products, it is one of the easiest ways to begin home canning. The key is using a tested recipe, following the processing time, and making the correct altitude adjustment when needed.
Before You Begin
The first thing to understand is that water bath canning is for high-acid foods only. That includes most fruits, jams, jellies, pickles, relishes, and tomato products that have been properly acidified with bottled lemon juice, citric acid, or vinegar when the recipe calls for it. Whether a food belongs in a water bath canner or pressure canner depends on acidity, and low-acid foods need pressure canning.
For beginners, the safest place to start is with a tested recipe from a reliable source. Do not guess at processing times, do not remove vinegar or bottled lemon juice from a recipe, and do not assume every sauce or salsa can be water bath canned just because it tastes acidic.
Step 1: Choose the Right Recipe
Start with a tested water bath canning recipe. That recipe should tell you the jar size, headspace, processing time, and whether acid needs to be added.
Good beginner recipes include strawberry jam, apple butter, bread and butter pickles, pickled peppers, fruit preserves, and properly acidified tomato sauce.
Step 2: Gather Your Equipment
You do not need a fancy setup to start. You need a pot deep enough to cover your jars with 1 to 2 inches of water, a rack or something to keep the jars off the bottom, clean canning jars, new flat lids, rings, a funnel, a jar lifter, and a clean towel.
A splash of white vinegar in the canner water is optional, but it can help prevent cloudy mineral spots on the outside of the jars.
Step 3: Wash and Warm the Jars
Wash your jars and check for chips or cracks. Keep them warm while you prepare the food.
This is not about being fussy. It is about avoiding thermal shock. Hot food going into a cold jar, or a hot jar going into cooler water, can cause glass to crack.
Step 4: Prepare the Food
Make the recipe exactly as written. With water bath canning, the ingredients matter because the safety of the recipe depends on acidity, density, jar size, and processing time working together.
This is especially important with tomatoes and salsa. Tomatoes can sit close to the acidity line, so tested recipes often call for bottled lemon juice or citric acid. Do not skip that step.
Step 5: Fill the Jars
Set a warm jar on a towel, place the funnel on top, and ladle in the hot food. Leave the headspace listed in the recipe.
Headspace is the space between the top of the food and the rim of the jar. It gives the food room to expand during processing and helps the jar seal properly as it cools.
Step 6: Remove Air Bubbles and Wipe the Rims
Run a bubble remover or thin spatula around the inside of the jar to release trapped air. Recheck the headspace and adjust if needed.
Then wipe the rim clean. This matters, especially with sticky foods like jam or thicker sauces. Anything left on the rim can interfere with the seal.
Step 7: Add the Lid and Ring
Place the flat lid on the jar and add the ring fingertip tight.
Do not crank it down. The jar needs to be able to vent during processing. Fingertip tight is enough.
Step 8: Lower the Jars Into the Canner
Lower the jars straight down into the hot water. Make sure the water covers the tops of the jars by 1 to 2 inches.
Put the lid on the canner and bring the water back to a full rolling boil.
Step 9: Start Timing at a Full Boil
This is one of the biggest beginner mistakes.
Your processing time starts after the water returns to a full rolling boil, not when the jars go into the pot.
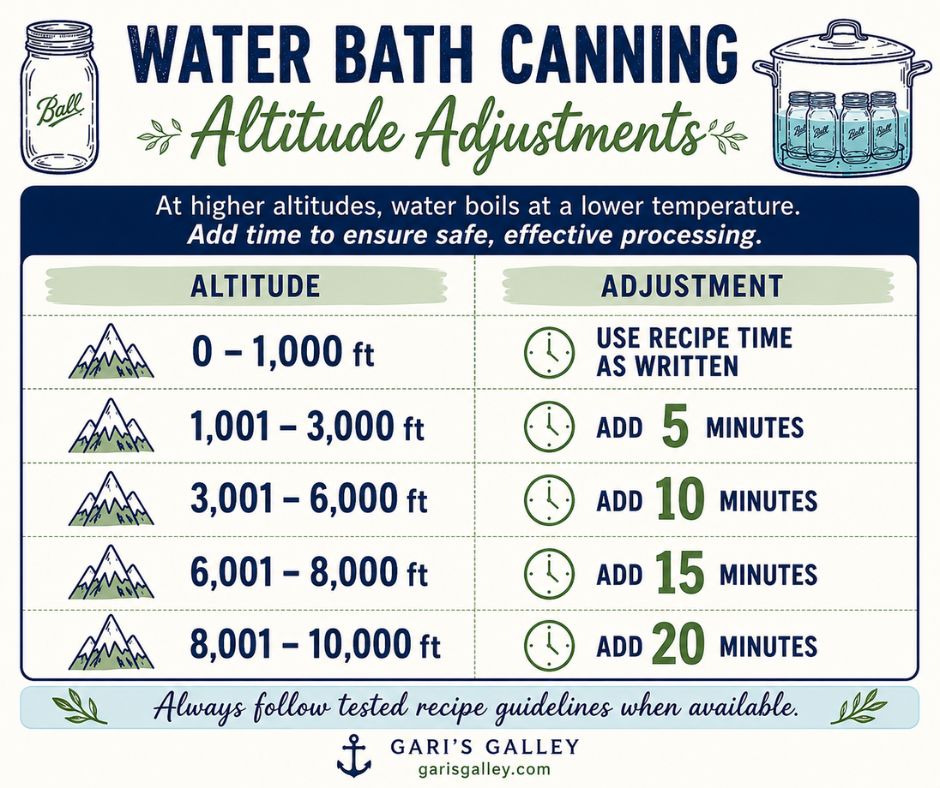
Process for the full time listed in the tested recipe, adjusting for altitude if needed. Higher altitude means water boils at a lower temperature, so water bath canning recipes need extra processing time above 1,000 feet.
Step 10: Let the Jars Rest Before Removing
When the timer goes off, turn off the heat, remove the lid, and let the jars sit in the canner for about 5 minutes.
That little pause helps everything calm down before the jars come out of the water and can help reduce siphoning.
Step 11: Remove and Cool
Lift the jars straight up. Do not tilt them.
Place them on a towel-lined counter and leave them alone for 12 to 24 hours. Do not press the lids, tighten the rings, or move the jars around while they are cooling.
Step 12: Check the Seals
Once the jars are fully cooled, check the seals. The center of the lid should not flex up and down.
Remove the rings before storing. This helps prevent trapped moisture, rust, and hidden seal issues.
Any jar that did not seal should go into the refrigerator and be used first.
What Can Be Water Bath Canned?
Water bath canning is safe for high-acid and properly acidified foods. Common examples include fruits, applesauce, fruit butters, jams, jellies, marmalades, preserves, pickles, relishes, chutneys, salsa, ketchup, BBQ sauce, and tomato products that have been properly acidified according to a tested recipe. High-acid foods such as fruits, pickles, relishes, acidified tomatoes, jams, fruit butters, marmalades, and preserves are commonly processed in a boiling water bath.
What Should Not Be Water Bath Canned?
Do not water bath can meats, poultry, seafood, broth, stock, soups, beans, corn, potatoes, carrots, green beans, or low-acid vegetables unless they are safely pickled with a tested recipe.
Those foods require pressure canning.
Water Bath Canning vs. Pressure Canning
Water bath canning uses boiling water and is for high-acid foods.
Pressure canning uses steam under pressure and reaches a higher temperature, which is required for low-acid foods. That is why pressure canning can be used for more types of food overall, but water bath canning is often the easiest place for beginners to start.
Final Note
Water bath canning is not complicated once you understand the steps. Start with a tested recipe, keep your jars warm, follow the processing time, adjust for altitude, and let the jars cool undisturbed.
Below the recipe card, I’ll include a link to some of my favorite canning equipment for anyone getting started.