
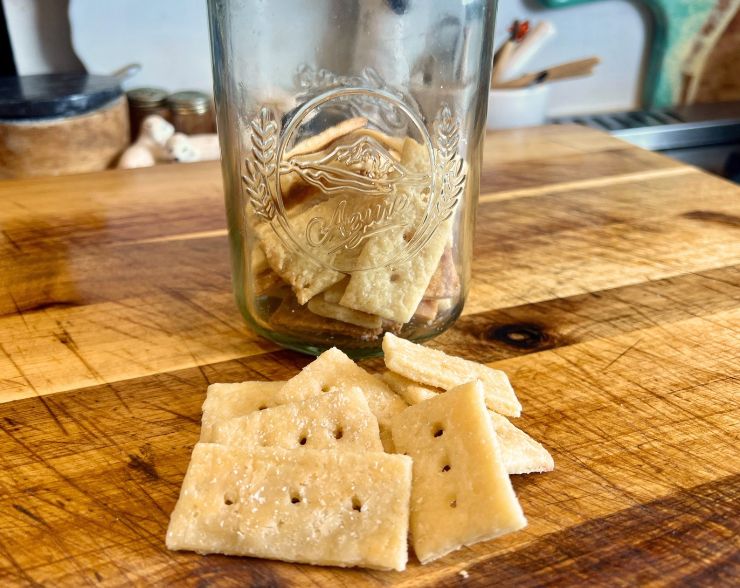
Homemade Club Crackers

These homemade club crackers are crisp, buttery, and delicately flaky, with thin golden layers and just the right touch of salt. Rolling the dough exceptionally thin is the secret to creating that familiar light, crisp texture.
Ingredients
- ½ cups unbleached all-purpose flour 180 grams
- 2 teaspoons cane sugar
- ¾ teaspoon Diamond Crystal kosher salt
- ½ teaspoon baking powder
- ⅛ teaspoon baking soda
- 6 tablespoons cold butter 85 grams, cut into small cubes
- ⅓ cup cold whole milk 80 grams, plus more only if needed
- tablespoon butter melted, for finishing
- Diamond Crystal kosher salt for finishing
Instructions
- Add the flour, cane sugar, kosher salt, baking powder, and baking soda to a food processor. Pulse several times to distribute the ingredients evenly.
- Add the cold cubed butter. Pulse 6 to 8 times, or until the butter is broken into small pieces and the mixture resembles coarse crumbs. Small visible pieces of butter are desirable and will help give the crackers their flaky texture. Do not process the mixture until completely smooth.
- Pour in the cold milk. Pulse in short bursts just until the mixture forms moist clumps. Pinch a small amount between your fingers. If it holds together, it is ready. The mixture does not need to form a ball inside the food processor. If it remains dry and falls apart when pinched, add additional milk 1 teaspoon at a time, pulsing once or twice after each addition.
- Turn the crumbly mixture onto a sheet of parchment paper. Place your hand underneath one side of the parchment and lift the paper, using it to fold that side of the mixture over the center. Lay the parchment flat again and gently pat the top of the mixture to help the crumbs hold together.
- Lift the opposite side of the parchment and use it to fold the mixture over the center again. Lay the parchment flat and gently pat the mixture together. Rotate the parchment one-quarter turn and repeat the folding and patting from both sides.Continue using the parchment to fold the mixture over itself until the crumbs come together and form a dough. Do not knead the dough or work it until completely smooth. Use only enough pressure to make it hold together.Flatten the dough slightly and divide it into two equal portions. Press each portion into a flat rectangle, cover, and refrigerate for 30 to 60 minutes.
- Heat the oven to 400°F. Position a rack in the center of the oven.
- Place one chilled portion of dough between two sheets of parchment paper. Keep the remaining portion refrigerated while you work.
- Roll from the center outward until the dough is approximately 1/16 inch thick or slightly thinner. Peel back and reposition the top parchment occasionally to prevent deep wrinkles. Flip the entire parchment packet and roll from the other side as needed to keep the thickness even.
- Roll the dough thinner than you think a finished cracker should be. The crackers will puff slightly as they bake, and dough that is too thick will produce a tender cracker rather than a crisp one.
- Remove the top sheet of parchment. Using a pizza cutter, pastry wheel, or sharp knife, trim uneven edges if desired and cut the dough into rectangles approximately 1¼ by 2½ inches. Press the scraps together and reroll them between parchment.
- Prick each cracker several times with a fork or skewer. These small holes allow steam to escape and help prevent the crackers from puffing excessively.
- Separate the crackers slightly so heat can circulate around their edges. Slide the parchment with the crackers onto a baking sheet.
- Bake for 14 to 17 minutes, rotating the pan halfway through. Begin watching closely around 12 minutes because thinner crackers and those around the outside of the pan may brown sooner. The crackers are ready when the edges are golden and the centers have developed a light golden color.
- While the first pan bakes, roll, cut, and dock the remaining chilled dough. If the dough becomes soft or sticky, return it to the refrigerator for 10 minutes before continuing.
- Remove the baked crackers from the oven. Immediately brush the tops lightly with melted butter and sprinkle with Diamond Crystal kosher salt.
- Transfer the crackers to a cooling rack and allow them to cool completely. They will continue to firm and become crisper as they cool.
Notes
- Rolling the dough evenly and exceptionally thin is the most important part of this recipe. Thicker crackers will still taste delicious, but they will be softer and more biscuit-like rather than crisp.
- The exact baking time will depend on the thickness of the crackers and the color of the baking sheet. Use their golden color as the final guide rather than relying only on the timer.
- If some crackers brown sooner than others, remove those crackers and return the remaining ones to the oven for another minute or tw
Storage
- Allow the crackers to cool completely before storing them in an airtight container at room temperature. If they lose some of their crispness, place them in a 300°F oven for 3 to 5 minutes, then cool completely before returning them to the container.
Tried this recipe?Let us know how it was!