
A Clear, Practical Guide for Beginners
If you’ve ever wanted to start pressure canning but felt unsure where to begin, you’re not alone.
There’s a lot of noise online. Strong opinions. Conflicting advice. Complicated explanations.
Here’s the simple truth: pressure canning is not difficult. It is structured.
Once you understand the order of operations and why each step matters, it becomes predictable and manageable. You don’t need to know everything at once. You just need to understand how the system works.
Let’s walk through it clearly.
What Pressure Canning Is — and Why It Exists
Pressure canning is designed for low-acid foods.
That includes:
Meat and poultry
Beans
Broth and stock
Most vegetables
Properly formulated soups
Low-acid foods must reach approximately 240°F inside the jar to destroy harmful spores. A water bath can only reach boiling temperature, which is not high enough.
A pressure canner creates a sealed environment where steam builds pressure. As pressure increases, the boiling point of water rises, allowing the temperature inside the canner to climb high enough for safe preservation.
That is the entire purpose of pressure canning.
You Need a Pressure Canner, Not a Pressure Cooker
These are not interchangeable.
A true pressure canner:
Is large enough to hold at least 4 quart jars
Is specifically tested and approved for home canning
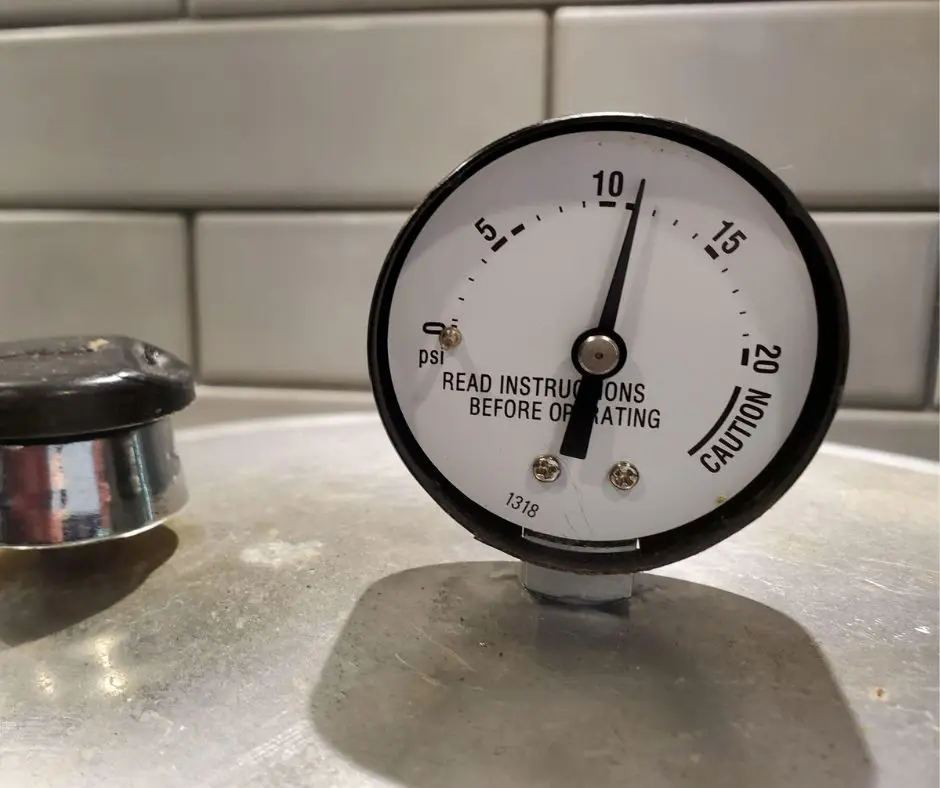
Has either a weighted gauge or a dial gauge
Many countertop pressure cookers and electric multi-cookers are not approved for safe pressure canning.
If you are starting out, make sure your equipment is labeled as a pressure canner.
Know Your Canner
Every pressure canner is slightly different.
Some use a weighted regulator that rocks or jiggles during processing.
Some use a dial gauge that you monitor with a needle.
Many modern canners include both.
What matters most is this:
Understand how your canner regulates pressure and follow your manufacturer’s instructions.
Before your first batch, take a few minutes to:
Read your manual
Identify how pressure is controlled
Learn how your model vents steam
Understand how to bring it up to pressure safely
Once you’ve used it once or twice, it becomes second nature.
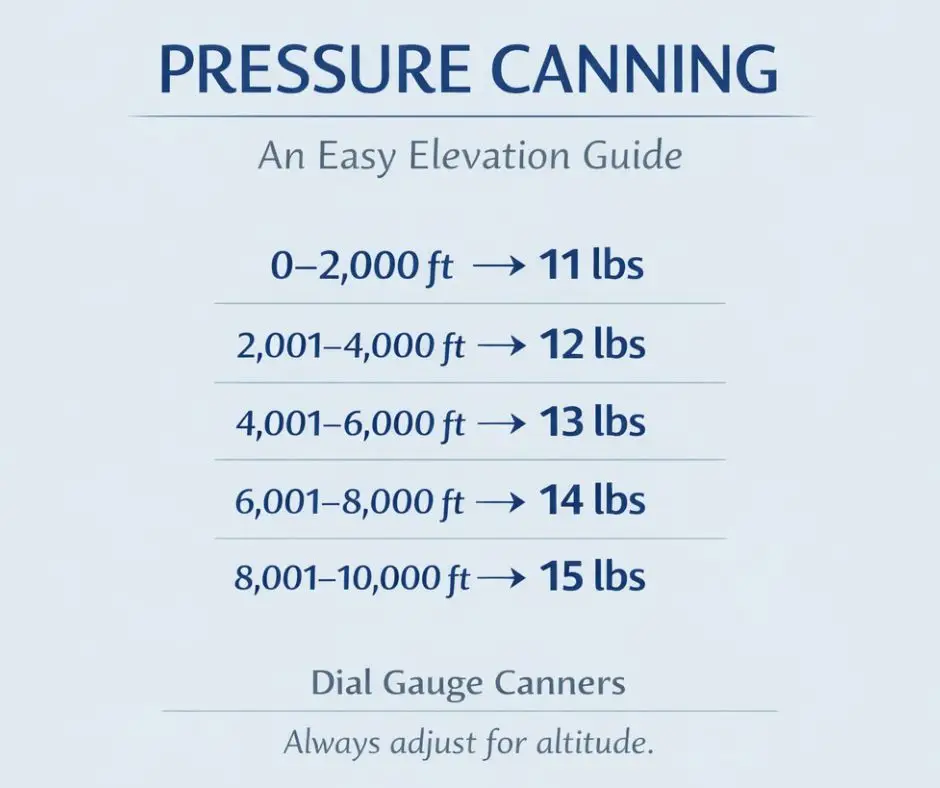
Know Your Elevation
As elevation increases, water boils at a lower temperature. That means pressure must increase to maintain safe internal heat.
Before you begin pressure canning, find your elevation and adjust pressure accordingly.
This is a normal part of the process and one that quickly becomes routine.
Use Tested Recipes
Pressure canning is not the place to experiment with structure.
You can adjust:
Dry herbs
Spices
Salt levels
You should not add:
Dairy
Cheese
Cream
Flour
Pasta
Thick purees
Thickness and fat change how heat moves through food. If heat cannot penetrate evenly to the center of the jar, safety cannot be guaranteed.
If you want a creamy soup or pasta dish, add those ingredients when you open the jar later.
The Basic Flow of Pressure Canning
Seeing the process as a sequence makes it far less intimidating.
Prepare food according to a tested recipe.
Inspect jars and keep them warm.
Fill jars, leaving proper headspace.
Remove air bubbles and wipe rims.
Apply lids and tighten rings fingertip tight.
Add 2 to 3 inches of water to the canner, or follow your manufacturer’s instructions.
Load jars onto the rack and lock the lid.
Allow steam to vent steadily for 10 full minutes.
Add the weight or close the vent according to your model.
Bring to the correct pressure.
Start timing once full pressure is reached.
Maintain steady pressure for the entire processing time.
Turn off heat and allow pressure to return to zero naturally.
Remove jars and let them rest undisturbed for 12 to 24 hours.
Remove rings, wash jars, label, and store without rings.
What Not to Pressure Can
There is a lot of creativity in cooking. Pressure canning simply has boundaries.
Do not pressure can:
Dairy-based sauces like Alfredo
Cream soups
Flour-thickened gravies
Pasta or noodles
Thick pumpkin or squash purees
Recipes that have not been tested
You can always add dairy, pasta, or thickening after you open the jar.
Common Beginner Mistakes
A few things to avoid:
Skipping the 10-minute venting step
Guessing your elevation
Forcing the canner to cool down quickly
Letting pressure drop during processing without restarting the timing
Over-tightening rings
Most problems come from rushing. Pressure canning rewards patience.
Is Pressure Canning Safe?
Yes, when done properly.
Millions of jars are safely pressure canned every year in home kitchens.
It is controlled heat science.
When you understand what the canner is doing and follow tested guidelines, you are working within a system that has been carefully studied and refined.
Getting Started
If you are new, start simple.
Dry beans
Chicken stock
Plain vegetables
Choose something straightforward. Follow the steps exactly. Learn how your stove behaves. Learn how your canner sounds.
Confidence comes quickly.
You do not need a farm.
You do not need hundreds of pounds of produce.
You can begin with a single bag of beans.
Final Thoughts
Pressure canning is not complicated. It is structured.
Once you understand the structure, the intimidation fades.
Take your time. Follow tested recipes. Respect the process.
And before long, you will have a pantry filled with jars you preserved yourself.