
Canning Fresh Pineapple
Fresh pineapple preserved at home using a simple hot-pack method. This version includes both a water bath canning option for shelf storage and an easy refrigerator version if you’re not processing jars.
Ingredients
- 1 Fresh pineapple
- pure cane sugar or honey ot maple syrup
- filtered water
Instructions
Prepare the Pineapple
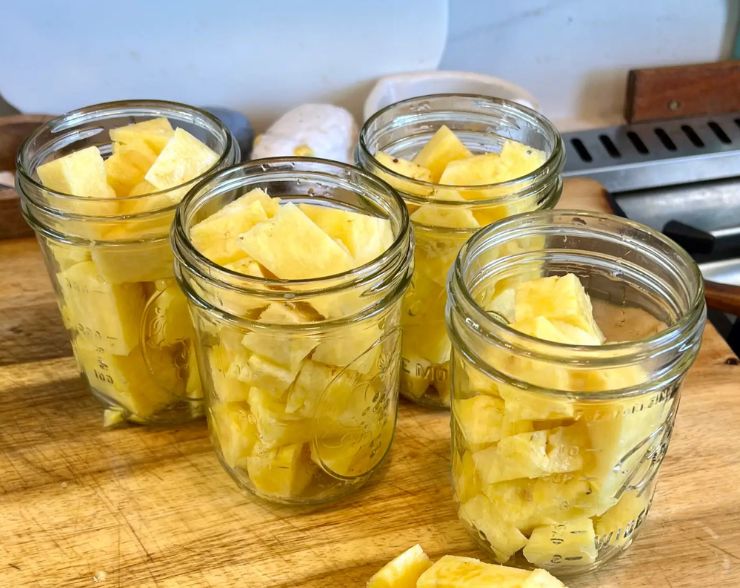
Cut off the top and bottom so the pineapple sits flat.Slice away the peel, removing the eyes as you go. Set the peel aside if you want to use it for pineapple skin water or tea.Cut the pineapple into quarters lengthwise. From there, run your knife down each quarter to remove the core.Cut into chunks or tidbits, depending on how you want to use it later.Chop the cores and set them aside.Make the Pineapple Core Liquid
Add the chopped cores to a pot and pour in filtered water, about 1 1/2 cups per quart jar you plan to fill.Bring to a boil and let it boil for 5 minutes to pull out the flavor.Strain out the solids and keep the liquid hot.Prepare the Jars
If you’re water bath canning, keep your jars hot and ready to fill.If you’re refrigerating, jars should still be clean and warm so they don’t crack when the hot liquid goes in.Fill the Jars
Pack the pineapple into the jars, leaving space for the liquid to move through.Add sweetener if using, 1 to 3 tablespoons per pint, depending on your taste.Pour the hot pineapple liquid over the fruit, leaving 1/2 inch headspace.Run a utensil around the inside to release air bubbles, adjust liquid if needed, then wipe rims and apply lids and bands.Water Bath (Shelf-Stable)
Place jars in a boiling water bath.Process:Pints – 15 minutesQuarts – 20 minutesRemove and let cool undisturbed for 12 to 24 hours.Refrigerator Version
Let the jars cool to room temperature, then move them to the refrigerator.Keep refrigerated and use within about 1 to 2 weeks.
Notes
- Sugar can be added to the pot or directly to each jarMost pineapples yield about 4 pint jarsPineapple skins can be used for tea or infused water
Tried this recipe?Let us know how it was!